How To Create Flower Coasters With Geneva Vanderzeil

Crafting a gift doesn't have to stop when you leave primary school, and nothing says 'I love you' more than a present you have made yourself. So with Mother's Day just around the corner, I wanted to find a unique way to spoil that special person who is always there for you.
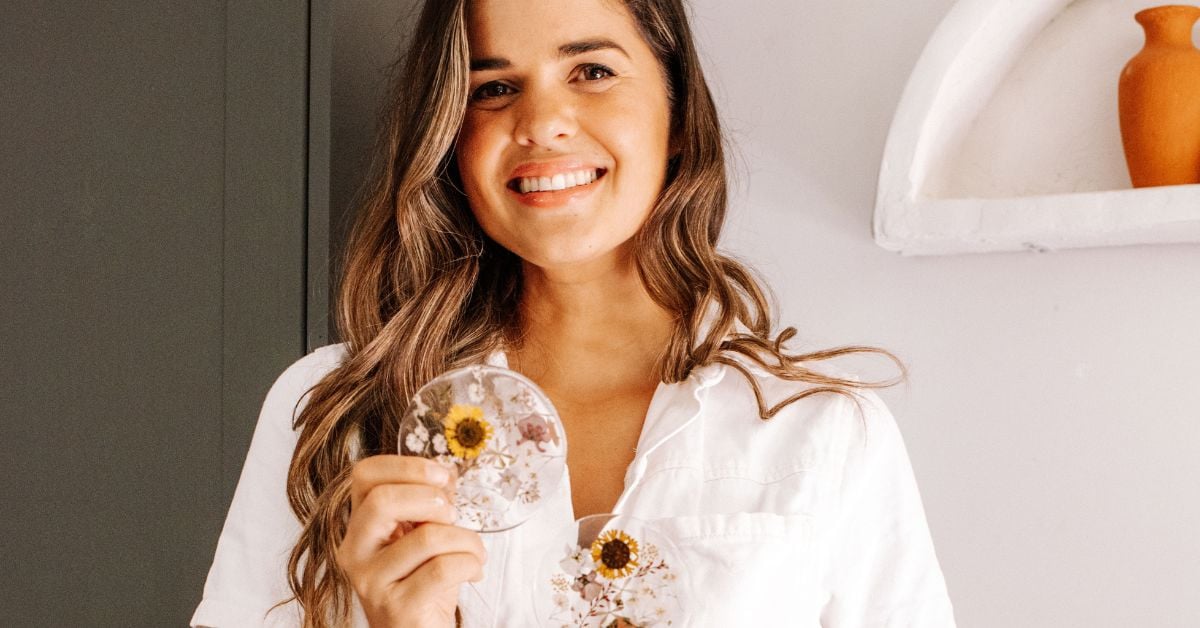
For this project, we will be making some one-of-kind flower coasters. It is such a sweet gift, and it is sure to bring a smile to your mum or the motherly figure in your life. But, of course, you can make these coasters for anyone you cherish on any occasion. And you can even replace the flowers with photos, collages, drawings or gold flakes, for example.
What you need
To create these flower coasters, you will need:
- A mix of small fresh flowers
- Coaster mould
- Epoxy clear resin and hardener
- Tweezers
- Plastic spoon or spatula
- Heavy book
- Baking paper
- 2 x small plastic tubs
Approximate time: 1.5 hour (excluding drying time)
Difficulty: ★★☆☆☆
The project step by step
Step #1
If you're using flowers, the first step is to press them. To do this, simply place some paper inside a heavy book and add the flowers. Then, close the book and leave them to dry flat. Ideally, this should be done for a week or two. For the nicest touch, use your mum's favourite flowers, such as daisies, lavender or anything delicate and small enough to fit on a coaster. You can also opt for a variety of colours. And if you don't have enough time to dry flowers, you can use photos, collages, gold flakes or glitter.
Step #2
It is time to assemble your coaster using a two-part epoxy resin which you can purchase from a craft store. Make sure you are working in a well-ventilated space, wear gloves and follow safety instructions as per the box. Pour equal parts of the resin and hardener together in your plastic container. Spend two minutes gently combining them with a spatula. Don't be vigorous as you don't want to create any bubbles in the mixture.
Step #3
Take a clean coaster mould and pour a thin layer of the mixture into the bottom.
Step #4
Add in the pressed flowers. Using your tweezers, place the flowers' face down into the mixture. The bottom of the mould will actually end up being the top of the coaster once it is set. There are no rules when it comes to arranging the flowers; just go with what you like. Add flowers until you are happy with the design.
Step #5
Leave your creation for a few hours so it can harden. If you are making a set of coasters, you might want to try and make each one similar or use the same flowers but slightly rearranged from each other.
Step #6
Add a final layer of the two-part epoxy resin. Leave your coaster to dry for another 24 hours, and then your coaster will be ready to be taken out of the mould. This is my absolute favourite part of this craft project. It is hugely satisfying popping them out, and they look so fabulous! This is a gift that your mum or that special mother figure in your life will treasure.
You can see the video of this project’s step-by-step here. And for more inspiration, DIY projects and styling tips, don't forget to follow our Instagram account!
DISCLAIMER - The information provided is for guidance and informational purposes only and does not replace independent business, legal and financial advice which we strongly recommend. Whilst the information is considered true and correct at the date of publication, changes in circumstances after the time of publication may impact the accuracy of the information provided. LJ Hooker will not accept responsibility or liability for any reliance on the blog information, including but not limited to, the accuracy, currency or completeness of any information or links.


